Have you ever pondered as to why some books almost immediately leap into your hands while others quietly merge into the background? A lot depends on the cover. To know how to draw a book cover is more than an artistic task; this is your chance to take a visual shot at selling your story to the world. Whether you are an author, illustrator, or keen beginner, this guide brings you step by step into creating a mighty book cover: one thoughtful stroke at a time.
Why Does Your Book Cover Matter So Much?
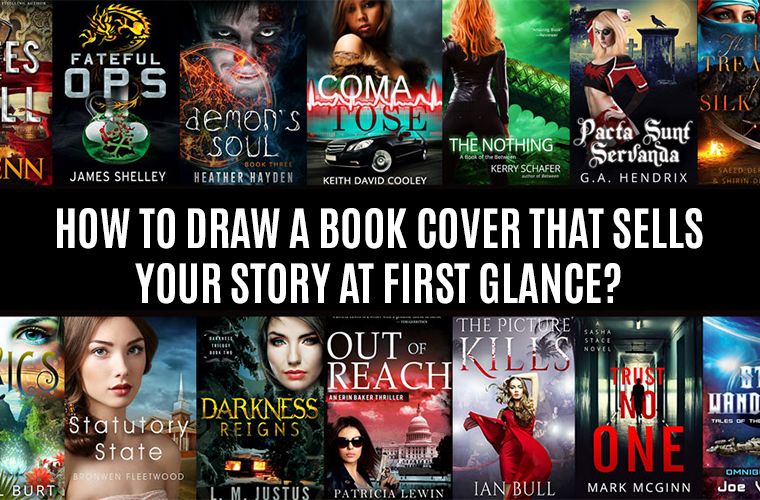
The book cover is the first handshake of your story with the world. It visually promises the content inside. Books are picked up or clicked on within seconds by most readers after deciding if they are interested; this decision often rests purely on the cover. Learning to create a book cover is to learn to distill your story and communicate it clearly, emotionally, and stylishly. The right cover design not only attracts readers; it communicates your genre, tone, and individual message in the blink of an eye.
What Should You Consider Before Drawing a Book Cover?
You should pause and think carefully about what the cover is going to accomplish before even intending to sketch something or start a design application. Depending on the genre, it would play an important role. For example, magical landscapes or heroic characters should be created if it’s a fantasy novel; on the other hand, shadows, stark contrasts, or hidden signals would be needed for a mystery thriller.
It is another crucial step to comprehend your audience. Covers for children’s books completely differ from those for self-help books or sci-fi epics. Clarity on the audience will inform your selection of styles, colors, and layouts.
Also, keep in mind the other formats of the book. Each format, whether for Kindle, paperback, or hardcover, has different requirements for dimensions. Think about where to place the title and author’s name. Another important point in learning to design a book cover is planning for areas of text that will enhance, not overpower, the artwork.
How Can You Turn Story Elements into a Visual Concept?
With a firm grasp on genre, audience, and format, you can now conjure visuals. Focus on the story’s major themes, symbols, or settings. Ask yourself, what is the one image that would pique the curiosity of anyone watching it? A potent object from the story? Maybe a mysterious character or an atmospheric setting that resonates with the mood of the story.
Inspiration is a big help at this stage. Check out books with a similar genre. Create a mood board filled with color schemes, reference images, and artistic styles that speak to you. Now, go ahead and create quick thumbnail sketches. These sketches are quick and can help you test ideas without any real commitment. This phase enforces a creative direction to you when learning how to draw a book cover before anything is designed at full scale.
Do You Need to Be a Skilled Artist to Draw a Book Cover?
Not all small-scale illustrators need to make exciting covers. A number of very popular covers are minimalistic, focus on bold typography, and/or are simple but symbolic. So if you are one who is still working on his drawing skills, work instead with the strong suits you have.
Think: abstract shapes, silhouettes, or texture work to set the mood for the story. If you work more on the digital side, manipulating graphics with layers and visuals in something like Canva or Procreate, or Photoshop may be your best friends in setting up the look of your artwork.
The lessons in the drawing book cover a positivist range of intention and emotionality. The simple, straightforward image that presents your identity for the book will always triumph over an overly intricate picture that only leaves the viewer in confusion.
What Is the Step-by-Step Process for Drawing a Book Cover?
Now, decide how large your canvas is going to be based on what you want to publish. You can place and guide where the title and author name will appear, just to be balanced. Next, begin a sketch: first, the loose version of the main image, be it a character, landscape, or object. Keep in mind that the lines are light and editable.
You can define your drawing with darker lines once you like the layout, or you could add a new layer for this whilst working digitally. This stage defines your design. Color is next added. Pick a palette that fits your story’s mood. Warm tones sound much like romance or fantasy, while blues or darks are probably much more suitable for thrillers or horror. Also, add shadow and light to create dimension and drama.
Then, add your text. Choose the types that suit the genre, but remember that the title should be readable even in thumbnail size since that’s how most readers see book covers online. Position it such that it complements and does not compete with the image. Finally, check the design, zoom out to see the entire design for its balance, and make a few final adjustments concerning color, contrast, and alignment. Save the final design in high-resolution formats for print and digital uploads.
Why Should You Learn How to Draw a Book Cover Yourself?
Drawing your own cover gives you complete creative control. You know your story better than anyone, and creating the visual version of it can be a deeply rewarding process. It also saves money, especially if you’re self-publishing or just starting out.
But more than that, when you learn how to draw a book cover, you gain a new skill that can be applied to future projects. You build a connection between your narrative and your visual presentation, making your book more cohesive and personal.
Most Popular Questions about How to Draw a Book Cover
Can I still create a book cover using traditional methods?
Yes, you can utilize anything: applied pencil, pen, marker, or paint. All that matters is finishing off with a scan of your artwork done at a high resolution of 300 DPI or above for professional use.
What software is best for drawing a digital cover for a book?
The main competitors are Photoshop, Procreate, Clip Studio Paint, and Krita. All of these come with layers, brushes, and templates – everything you need to create a fine piece of cover art.
What size book covers are there?
The average number would be 6 x 9 inches for novels and 8.5 x 11 inches for workbooks. The first step, in any instance, is to check with whichever publishing platform you have chosen regarding the sizes and bleed requirements.
Should the back cover and spine be designed simultaneously?
Yes, for a printed book, all the elements-the, the front, back, and spine-should be designed in one complete layout. In the case of e-books, only the front cover is needed.
How can I make my cover look professional even if I am not a pro artist?
A professional book cover incorporates a number of design elements: a clear layout, fonts that suit the genre, a strong centerpiece image, and plenty of white space; colors should convey an emotion. Keep it simple-consistency can be powerful.
Is Now the Time to Draw Your Book Cover?
Well, you’ve got the equipment and the mechanisms, along with the muse. Then why wait? Maybe learning how to draw a cover for a book might be the next great creative adventure in your life- perhaps even if the manuscript is still in your mind or half-written, the cover could really be the touch that will make it feel real and finished and unforgettable.
Are you ready to draw the first glimpse of your tale?
So now that you are ready to convert your story into visually enhanced designs that grab instant attention from readers? Would you want your book to sit in the background? Follow these design strategies and create a cover so loud that it has to be noticed!
This is a call for self-publishing authors, book designers, or illustrators who would want to improve on their skills: Start sketching your next great cover! Have questions? Need feedback on your design? Get in touch or please share your cover with us; we would love to see what you are working on!